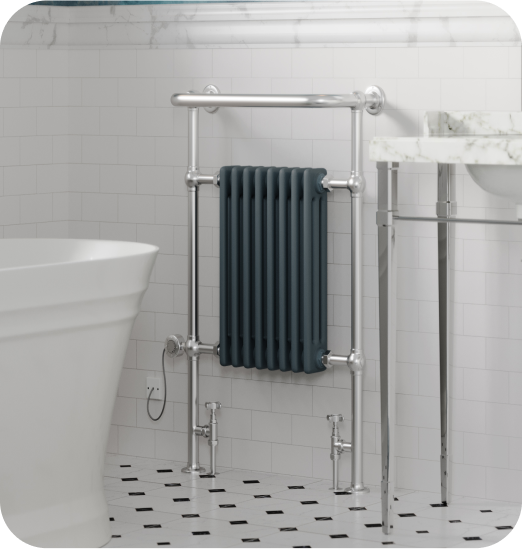
Fancy yourself as a bit of a DIY pro? You can save both time and money by installing your own heated towel radiator. A
heated towel radiator can warm your bathroom while also keeping your towels dry and toasty. Imagine stepping out of the shower and grabbing a warm, fluffy towel to dry off with - there’s no greater feeling. Once you’ve experienced the pure joy of a heated towel you’ll wish you installed one sooner! If you’ve recently treated yourself to a heated towel radiator and want to give fitting it yourself a go, we’ve created this complete guide to help you along the way.
Tools You’ll Need
Before installing your radiator there are few tools you’ll need to have first:
- Pencil
- Tape measure
- Spirit level
- Adjustable spanner
- Pipe and cable detector
- Power drill with masonry or ceramic tile bits
- Screwdriver
- PTFE tape
- Radiator key
- Old towels/sheets
Preparation
In an ideal scenario, your new towel radiator will simply fit in the exact space of your former radiator. This way, there’s no need to drain your system or pull up the flooring and skirting boards to connect to new piping. Your new radiator will just connect to the current piping system. So, all you’ll have to do is turn off the heating and isolate your old radiator before removing it. To do this you will need to turn off the valves. Commonly, radiators will have a lockshield valve with either a
manual or
thermostatic valve. When turning off the lockshield valve, it’s highly important to count the number of turns as this will need to be put back exactly how it was when we started. Then, for a manual valve, simply turn it off and remember the setting. For thermostatic valves, ideally you would remove the valve head and use the decorators cap that was supplied with it to turn it fully off. When the new radiator comes, it’s also important to remove all the packaging and give it a thorough look over to make sure everything is in order and there are no missing parts. Make sure to also place the radiator on an old towel or some cardboard so as not to damage the radiator. Turn off the water supply before starting your bathroom DIY and wear old, protective clothing.
1. Fit the Air Vents, Caps and Plugs
Use a spanner to securely fit the air vent, cap and blanking plugs but make sure you don’t over tighten these as this could cause an issue later on.
2. Mark the Height
Lift the towel rail and hold it in a position you’re happy with. Then, mark the height and the 4 corners which have connection points on the wall with a pencil.

3. Measure Accurately
From the height mark, measure the distance between the bolt holes on the side of the heated towel rail and between the foot of the rail and the bottom bolt holes and, again with a pencil, mark the bolt holes on the wall.

4. Check the Level
Check the bolt holes marked on the wall are level. If they are not, then repeat steps 3 and 4 until you’re happy with them.
5. Start Drilling
Now the time has come to start drilling the holes. Before you start, use a pipe or a cable detector to locate any hidden elements beneath the surface of a wall - enabling you to work safely. You’ll also need to make sure you use the right drill bit for the surface such as tile or masonry bits for example.
6. Remove retaining screw
Remove the retaining screw from the hanging brackets supplied with the product and attach the heated towel rail mounts to the fixings.
7. Mount the Towel Rail
Mount the heated towel rail on the wall using the fixed wall mounts and then secure it with the retaining screws you removed earlier.

8. Connect the Radiator to the Valves
Ensure to wrap the radiator tails (the part of the valve that screws inside the radiator) with PTFE tape. If you are using existing valves, it is best to remove and add new PTFE tape. Connect the valves to the new radiator, referencing the steps taken during the preparation process regarding the number of turns made to the lockshield valve and the setting for the manual valve (if applicable). You may also need to be prepared for any leaks when opening the valves so make sure you lay towels down or place a bucket underneath to catch the water. Noticed a leak in your radiator? Find
how to fix a leaking radiator in our helpful guide.

9. Bleed the radiator
Now that the radiator is connected to the heating system and the valves are on, as well as any leaks having been fixed, you will need to release the air from the top of the radiator by bleeding it. This is simply done with a radiator bleed key or screwdriver dependent on the type of vent on the radiator. With an old towel in hand, open the bleed valve until water sprays out, this will then ensure that your radiator heats up properly when the heating is turned on. Also, learn
how to balance a radiator for perfect heat distribution around your home.