How to Fix a Leaking Radiator
Leaking radiators are not only frustrating and damaging to your home, but unknown to most, the issue can sometimes be remedied quite easily and with very little cost. First things first, DON’T PANIC! To prevent a disaster, lay down some old towels if you have them to catch any water. This will give us time to work out what our issue is and how to resolve it.
Why do I have a Leaking Radiator?
The most common symptoms for this are:
- A leaking radiator valve
- A leaking radiator connection (where the valve connects to the radiator)
- A leaking radiator bleed valve or blanking plug
Causes of this could be:
- The connection thread has worn down, meaning water escapes.
- Pressure of the system being too high for the radiator design (common where it is happening on multiple radiators or recurring in a particular spot in your home).
An uncommon issue, which arises naturally over time, and usually only limited to very old radiators, is like all metal materials in contact with other elements - radiators can corrode over their lifetime and rupture.
BE SAFE!
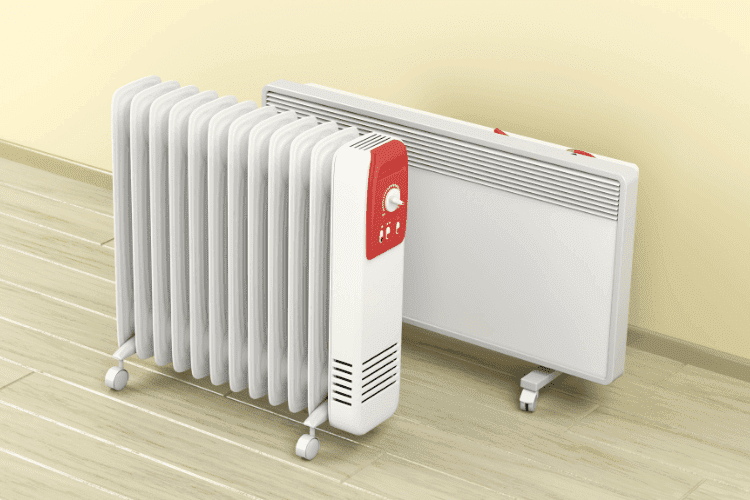
Before we can fix our leak, we need to identify it. But we need to be safe. You don’t want to be playing around with hot water or hot radiators, so when carrying out these processes, make sure your heating system is off and the radiator is cool. It is also very difficult to identify a leak while the radiator is on. If the radiator is electric, it is not recommended that you attempt to fix a leak yourself - and you should consult a professional. It is also worth considering a replacement, as a leaking electric radiator is neither good for your home or piece of mind. We have a range of electric radiators on our site if you’re in need of a replacement. If your radiator is dual fuel (has central heating and electric element), we don’t recommend attempting to fix any issues of leaks that are present where the element is. If water has been running down the electric element, dependent on how the installer put it in, this may cause a safety issue, so consult a professional for these types of rads. But assuming all safety measures have been put in place by yourself as needed, let's first identify where the leak is coming from.
How to find a Radiator leak
We need to identify where the leak is to know if we can fix it ourselves. What you need:
- An old towel
- Some tissue
Firstly, dry off any wet parts of the radiator and valves.
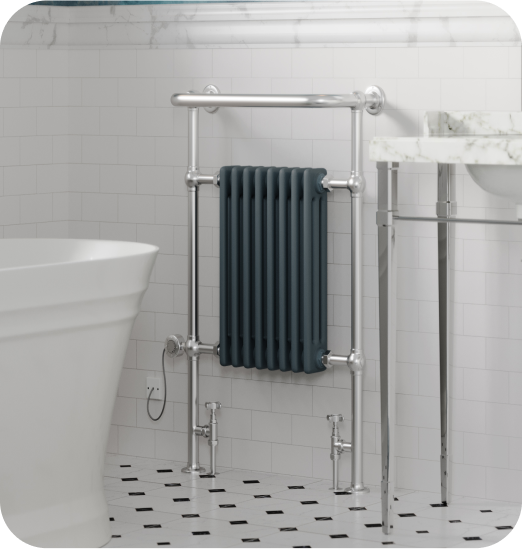
Leaking Radiator
Next, we want to identify whether the leak is coming from a connection/valve or from the actual radiator. If the leak is in the green areas on the below diagram (near where the valves connect to the radiator), then go to the next sections, as this is something we may be able to resolve quite easily. If the leak is not near where the valve or the radiator connection is, so anywhere in the red section, then it means the radiator itself has the leak. This is not something you will be able to fix and will require replacing the radiator. In this case, you’ll need to turn off both of the valves connecting to the radiator, and get yourself a new radiator. It may also be worth renewing the valves at the same time which you can also get from us. If your radiator has side connections: 
If your radiator has bottom connections: 
Different types of leaks on your radiator
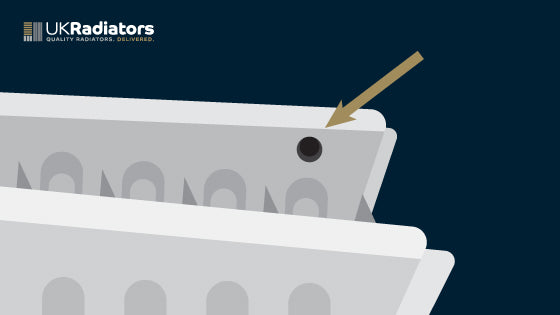
Leaking Radiator Bleed Valve or Blanking Plug
If you have a leaking radiator bleed valve or banking plug, dry the bleed valve/blanking plug highlighted on the image below and wait a minute or two. If your radiator has side connections:

If your radiator has bottom connections: 
Run some dry tissue over the bleed valve/blanking plug, and if the tissue is wet at that point then this is something we can fix ourselves without draining the whole system. You go ahead and skip to the “How to Fix a Leaking Radiator Bleed Valve or Blanking Plug” section.
Radiator Leaking at the Connection or Radiator Tail
If your radiator is leaking at the connection, dry the connection (indicated on the image below) and wait a minute or two. If your radiator has side connections: 
If your radiator has bottom connections: 
Next, run some dry tissue over the radiator connection. If the tissue is wet at that point then this is again something we can fix ourselves without draining the whole system. Just head to the “How to fix a Radiator leaking at the Connection” section of this blog. If that is not the issue then see the next section.
Leaking Radiator Valve Connection
If your valve is the source of the leak, then dry the valve union nut (indicated on the image below) and wait a minute or two. If your radiator has side connections: 
If your radiator has bottom connections: 
Run some dry tissue over the nut, if the tissue is wet at that point then - you guessed it - we can fix it ourselves without draining the whole system. Skip to the “Fixing a Valve Connection Leak” section of this blog.
Leaking Radiator Valve head
If the valve head is leaking, then you’ll want to dry the valve head and the pipe just below the valve head (highlighted on the image below) and wait a minute or two again. If your radiator has side connections: 
If your radiator has bottom connections: 
After a minute, run some dry tissue over the pipe just below the valve head, and if the tissue is wet, we can fix ourselves. Head over to the “Fixing a Leaking Radiator Valve head” section of this blog.
Pipe Connection Leak
With this kind of leak, whether we can fix this ourselves depends on whether the pipes are exposed or buried.
Buried Pipes
If the pipes are buried in the wall and a corner valve is in place, then it is not recommended that you fix this issue yourself. It is a high-risk low reward fix. This means even if you fix the issue, if the leak returns or becomes worse, you run the risk of damaging your property further. In this scenario, we would recommend that you purchase a new valve and get an expert to take a look.
Exposed Pipes
For exposed pipes, however, you can dry the pipe just below the union nut on the image below and wait a minute or two.
Run some dry tissue over the pipe, if the tissue is wet at that point then this is something we might be able to fix ourselves without draining the whole system. For this, you’ll need the “Fixing a pipe connection Leak” section below. If that is not the issue, then repeat the steps above until you find the leak.
Before we start to fix a leaking radiator…
Before we start, you need to be able to correctly turn off your valves. So let’s go over the different types and how you can turn them off. You may have a couple of different set ups...
- Commonly you will have a lockshield valve with either a manual or thermostatic radiator valve.
- However sometimes there is a manual valve in place of the lockshield valve.
Lockshield Valve

The important bit here is when you turn this valve off, you need to count the number of turns, as this needs to be put back exactly how it was when we started. Some valves you can just turn off, but sometimes you need to remove the head/cap of the valve and turn it off with a spanner. Clockwise (righty tighty) is off and often this is only a half turn.
Manual Valves
For the manual valves just turn them off and remember its setting. And remember, clockwise (righty tighty) is off.

Thermostatic Valves
For Thermostatic Radiator Valves (TRVs), ideally you would remove the thermostatic radiator valve head (usually just by unscrewing it) and use the decorators cap that was supplied with it to turn it fully off (little plastic cap). If you don’t have the decorators cap, then for this particular fix we may get away with just turning the TRV off as far as it will go (usually a snowflake icon or clockwise (righty tighty) as far as it will go). Some water may still come out after the bleed valve is removed, but not too much. However, to be safe, you might want to purchase an isolator.


How to Fix a Leaking Radiator Bleed Valve or Radiator Blanking Plug
There are a few different types of bleed valves out there, we will cover some of them in this article. Bleed Screw Only – These are sometimes found on older radiators, and there is no valve to replace or take off, just a small screw on its own. If the leak is from there, then it may be time to replace the radiator. 

Screw Type Valve – so this is a valve (looks like a large nut) with a screw in the middle. You can use a screwdriver on the screw in the middle. 
Key Type Valve - so this is a valve (looks like a large nut) with a square in the middle. You need a radiator key to turn this square in the middle. 
Blanking Plug – one side of the radiator may have a bleed valve, and the other side is just a flat blanking plug.
![]()
So is the issue with the Blanking Plug or the Bleed Valve?
Bleed Valve
We will tell you how you might be able to fix the one you have, but before we do that, a cheaper more efficient way of resolving this problem, that also increases the health and functionality of your radiator, is to install an Autovent Radiator Bleed Valve. This is a bleed valve that you attach to your radiator, which will automatically bleed the radiator when air builds up. If that is not for you, then let’s get on with fixing the current valve if we can. The first thing we need to know is whether the radiator is leaking from the inside or outside.
Inside Leak
Take a piece of dry tissue and push it into the valve around the screw (or square bit). If the leak is there, it is recommended that you replace the bleed valve - our Autovents are a great choice.

Outside Leak and Blanking Valve Leak
If the leak is not from the inside, then it’s probably from the outside. 
We can fix this issue and this will be the same for the blanking plug as well. What we need is some preparation... Make sure you have the following to hand:
- Large Bucket
- Something flat and deep to catch water, like a paint tray, old oven dish or tupperware.
- PTFE Plumbers Tape
- Adjustable Spanner
- Some old Towels
- Bleed/Radiator Key (For Key Type)
- Screwdriver (for Screw Type)
Step 1 – Turn off valves
Turn off your valves in the correct way. If you need a reminder, we covered each set up earlier in this post.
Step 2 –be prepared for water
Lay down some towels, and have your bucket ready. Use the flat deep object to catch water where you can under the valve.
Step 3 – Removing the valve/blanking plug
Using the adjustable spanner unscrew the valve/blanking plug slowly (anti-clockwise, lefty loosey). Expect some loss of water here, as the radiator will need to level off. If the flow doesn’t stop or slow at all, it probably means the valves are not off properly.
Step 4 – Prepare the valve/blanking plug
Next, you need to remove any old tape that may be on the blanking plug and if there is a rubber washer that is damaged or worn away, then you may need to remove this too. Remember to dry it with a towel before you add new tape.
Step 5 – Adding the PTFE Tape
This bit is quite important, the tape needs to wrap in a certain direction so it does not pull off when we screw the plug back in. How to add the PTFE tape:
- Hold the plug in your left hand, with the threads facing away from your fingers
- Hold some tape to the bottom of the thread
- Wrap over the top pulling it tight as you go, about 6 times
Step 6 – Put the valve into the radiator
Using the adjustable spanner, screw the bleed valve/blanking plug back into the radiator, if it is a bleed valve, make sure once tightened that the valve is in the off position (using the radiator key or screwdriver, turn the central part Clockwise - righty tighty).
Step 7 – Reset the lockshield, manual and TRV valves
Turn the lockshield valve back to its original position (remember we made sure we counted the turns before) and turn the radiator manual/thermostatic valve on as well, back to the desired temperature (number).
Step 8 – Bleed the radiator
Using the radiator bleed key or screwdriver, dependent on the valve type, and with a towel in hand, open the radiator bleed valve (lefty loosey) until water comes out and then tighten it again (righty tighty). 
For further help on this bit, see our blog on How to bleed radiator.
Step 9 – Test the leak
Dry the connection with a towel, wait a few minutes and then run a tissue over it. If the tissue is dry then we have successfully fixed the leak. If it is still wet, then either re-try the steps above, or it may be time for a new bleed valve (if you did not purchase one) or the radiator thread may be too damaged to fix. In this case, it would be time to replace the radiator. This type of leak can also return, so if it is a persistent issue, it may also be time to replace the radiator. If that is the case then hop over to our site to see what radiators are available to you.
How to Fix a Radiator Leaking at the Connection
Sometimes we may need to replace the radiator and/or valve for this issue, which you can see on our store page, but it can be possible to fix this, or at least temporarily fix this issue quite easily without draining the whole system. Make sure you have the following to hand:
- Large Bucket
- Something flat and deep to catch water, like a paint tray, old oven dish or tupperware.
- PTFE Plumbers Tape
- Adjustable Spanner
- Some old Towels
- Bleed/Radiator Key (For Key Type)
- Screwdriver (for Screw Type)
Step 1 – Turn off valves
Turn off your valves in the correct way. If you need a reminder, we covered each set up earlier in this post.
Check the valves are off
To check the valves are off, or off enough to do our job, open the bleed valve at the top of the radiator using a radiator bleed key or screwdriver as needed. Provided water doesn’t spray out, then we are good to go. Make sure to close the bleed valve after.
Step 2 – be prepared for water
Lay down some towels, have the bucket ready. Use the flat deep object to catch water where you can under the valve.
Step 3 – Slacken the Union Nut
With the adjustable spanner, slacken/loosen the union nut on the valve highlighted on the below image.

Step 4 – Expose the radiator tail
With the adjustable spanner, start unscrewing the next hex shown by the arrow on the image below. You may need to hold the valve with a grip to do this. You only need to expose 3-5 threads, if you loosen too much then the radiator will empty fully and you will have a lot of water to catch.
Step 5 – Prepare the radiator tail
Try to clean off any old sealant or PTFE tape.
Step 6 – Adding the PTFE Tape
This bit is quite important, the tape needs to wrap in a certain direction so it does not pull off when we screw the plug back in.
For radiators with a Side Connection
Sit behind the valve facing the radiator, you need to wrap the tape in an anti-clockwise direction around the thread. Wrap about 6 times if you can, pulling tight as you go.
For radiators with a Bottom Connection
Look down at the valve from above, you need to wrap the tape in a clockwise direction around the thread. Wrap about 6 times if you can, pulling tight as you go.
Step 7 – re-attach the radiator tail and valve to the radiator.
With the adjustable spanner, start screwing the hex shown with the arrow on the image below until the tail is back into the radiator and the threads are no longer exposed.
Step 8 – Tighten the union nut
With the adjustable spanner, tighten the union nut on the valve highlighted on the below image.
Step 9 – Reset your valves
Turn the lockshield valve back to its original position (remember we made sure we counted the turns before) and turn the radiator manual/thermostatic valves on as well, back to the desired setting.
Step 10 – Bleed the radiator
Using the radiator bleed key or screwdriver, dependent on the valve type, and with a towel in hand, open the radiator bleed valve (lefty loosey) until water comes out and then tighten it again (righty tighty).
For further help on this bit, see our blog on how to bleed a radiator.
Step 11 – Test the leak
Dry the connection with a towel, wait a few minutes and then run a tissue over it. If the tissue is dry then we have successfully fixed the leaking radiator. If it is still wet, then either re-try the steps above, or it may be time for a new valve or possibly the radiator thread may be too damaged to fix, so is time to replace the radiator. This type of leak can also return, so if it is a persistent issue, it may also be time to replace the radiator and valve. If that is the case, then hop over to our homepage to see what radiators are available to you.
Step 12 – Top up pressured systems
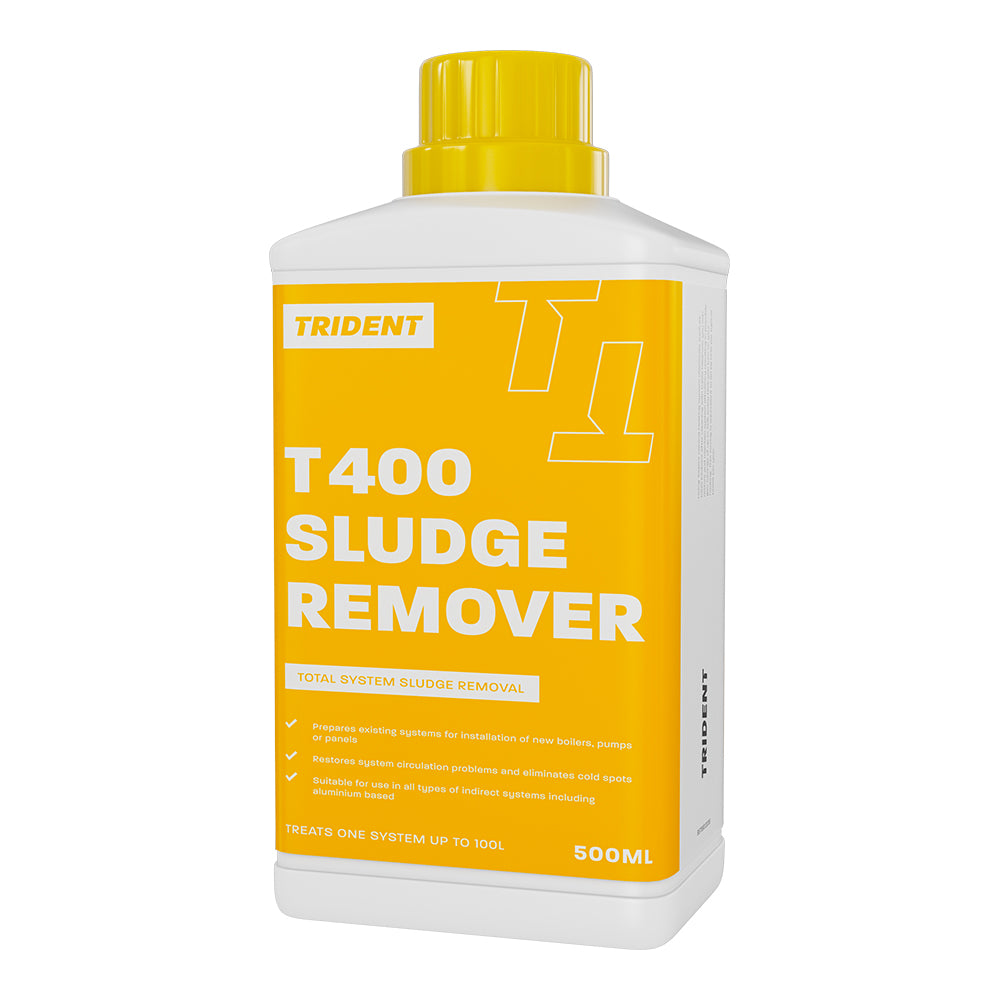
If you lost a lot of water from the radiator with this one, then you may need to top up the heating system if it is a pressured system. Consult your boiler/heating system manual for how to do this. If you do need to top it up, then it is also a good opportunity to add an inhibitor to the system.
Fixing a Valve Connection Leak and Union Nut Leak
Sometimes we may need to replace the valve for this issue, but it can be possible to fix this or at least temporarily fix this issue quite easily without draining the whole system. To do so, you’ll need the following:
- Large Bucket
- Something flat and deep to catch water, like a paint tray, old oven dish or tupperware.
- PTFE Plumbers Tape
- Adjustable Spanner
- Some old Towels
- Bleed/Radiator Key (For Key Type)
- Screwdriver (for Screw Type)
Step 1 – Turn off valves
Turn off your valves in the correct way. If you need a reminder, we covered each set up earlier in this post.
Check the valves are off
To check the valves are off, or off enough to do our job, open the bleed valve at the top of the radiator using a radiator bleed key or screwdriver as needed. Provided water doesn’t spray out then we are good to go. Make sure to close the bleed valve after.

Step 2 – be prepared for water
Lay down some towels, have the bucket ready. Use the flat deep object to catch water where you can under the valve.
Step 3 – Slacken the Union Nut
With the adjustable spanner, loosen the union nut on the valve highlighted on the below image.
We need to undo this enough to expose the olive. Note that water will start to come out of the radiator while we do this, so be prepared.
Step 4 – Adding the PTFE Tape
This bit is quite important, the tape needs to wrap in a certain direction so it does not pull off when we screw the plug back in.
Side Connection
Sit behind the valve facing the radiator, you need to wrap the tape in an anti-clockwise direction around the olive. Wrap about 6 times if you can, pulling tight as you go.
Bottom Connection
Look down at the valve from above, you need to wrap the tape in a clockwise direction around the olive. Wrap about 6 times if you can, pulling tight as you go.
Step 5 – Tighten the union nut
With the adjustable spanner, tighten the union nut on the valve highlighted on the below image.
Step 6 – Reset the lockshield, manual and TRV valves
Turn the lockshield valve back to its original position (remember we made sure we counted the turns before) and turn the radiator manual/thermostatic valves on as well, back to the desired setting.
Step 7 – Bleed the radiator
Using the radiator bleed key or screwdriver, dependent on the valve type, and with a towel in hand, open the radiator bleed valve (lefty loosey) until water comes out and then tighten it again (righty tighty). For further help on this bit, see our blog on how to bleed a radiator.
Step 8 – Test the leak
Dry the connection with a towel, wait a few minutes and then run a tissue over it. If the tissue is dry then we have successfully fixed the leak. If it is still wet, then either re-try the steps above, or it may be time for a new valve. This type of leak can also return, so if it is a persistent issue, it may also be time to replace the valve.
Step 9 – Top up pressured systems
If you lost a lot of water from the radiator with this one, then you may need to top up the heating system if it is a pressured system. Consult your boiler/heating system manual for how to do this. If you do need to top it up, then it is also a good opportunity to add an inhibitor to the system.
Fixing a Valve Head Leak
Before we do this, we need to consult our warranty document for the valve, as you should only play about with the mechanisms of the valve if it is out of warranty. Sometimes we may need to replace the valve for this issue, which you can easily do with us at UK Radiators, but it can be possible to fix, or at least temporarily fix, this issue quite easily without draining the whole system. You’ll need the following:
- Large Bucket
- Something flat and deep to catch water, like a paint tray, old oven dish or tupperware.
- PTFE Plumbers Tape
- Adjustable Spanner
- Some old Towels
- Bleed/Radiator Key (For Key Type)
- Screwdriver (for Screw Type)
Step 1 – How to turn off valves the right way
Now in this instance, turning the valves off can actually make the leak worse, as we know one valve is broken. So, by turning the other valve off, it may give the water only one option which is to escape through the broken valve. The recommended method is to get an isolator, which will also be handy to have if we have to replace the valve fully. Otherwise, turning the valves off in this instance depends on where the leak is.
Is the leak on the return flow?
If the leak is on the return flow, then turn off the other valve.
Is the leak on the hot water flow?
If the leak is on the hot water flow, then turning off the other valve will not help and the isolator may be a better option or attempt the fix without fully shutting off this valve.
Step 2 – be prepared for water
Lay down some towels, and have the bucket ready. Use the flat deep object to catch water where you can under the valve.
Step 3 – Remove the valve head
Remove the valve head, and note that for certain valves you may need to consult the user guide that came with it for instructions on how to do this. But, usually you just unscrew the valve head.
Step 4 – tighten the hex
Now this is important, as you need to tighten the hex a little bit, not fully tighten it. Just so there is a bit more tension. It still needs to be a bit loose in order to work.
Step 5 – Test the leak
Dry the connection with a towel, wait a few minutes and then run a tissue over it. If the tissue is dry then we have successfully fixed the leak. If it is still wet, then either re-try the steps above, or it may be time for a new valve. There are some other ways to fix this type of leak, but we don’t recommend them as this involves taking apart the valve, which is against its natural design. So, if the leak hasn’t been fixed then it is better to replace it. This type of leak can also return, so if it is a persistent issue, it may also be time to replace the valve, which you can easily do by hopping over to our site.
Fixing a Pipe Connection Leak
WARNING: there is a right way to do this, and a quick way to do this. The quick way may result in the water from your system emptying onto your floor, so do it right! On a lot of forums and videos, when fixing a leak here you will be told “do it quick enough, and everything will be fine”. The problem with this is that if you are here, you are unlikely to be a plumber doing these types of things every day, and as meagre mortals the way we get quicker at something is repetition. So unless you have done this before, then the quick way is not recommended. The other common option is you will be told to drain the system. Again, this is quite a complex process for what is needed as you won’t know if the issue is resolved unless you refill the system, see the leak is present, then empty the system again to fix. There is however a 3rd option that adds heaps of benefits in the long term. We would recommend that you get an isolator for this radiator pipe, two would be future proofing but we only need one to fix our current pipe issue. You can see the isolators on this page, but this product does sell itself, which you can see on this video (note the handles are detachable once in place so you don’t have a big red lever spoiling your décor). https://www.youtube.com/watch?v=Cl0ZGqhI9ro&feature=emb_title Our recommendation is to try step one below, and if that does not work, then to purchase an isolator kit.
Step 1 – Tighten the Union Nut
Tighten the union nut that connects to the pipe, be careful when tightening not to cause further damage. If that resolves the issue, then great, if not then go onto step 2.

Step 2 – Purchase and install an Isolator
Our recommended isolators are the Aladdin EasyFit isolators. They fit 15mm pipes, but any isolator you can get that will suit your pipe size will work fine. These will be great to have if other issues occur or if the same issue comes back as you will already be prepared for it, and they are also handy for removing radiators for decorating. Install these and put them into the off position. Alternatively, if you don’t want to install isolators, be prepared to drain down your system. You will need to consult your boiler/heating system guide for how to do this.
Step 3 – be prepared for water
Lay down some towels, have the bucket ready. And use the flat deep object to catch water where you can under the valve. Remember, even with the isolators, water can still come out of the radiator.
Step 4 – Slacken the Union Nut
With the adjustable spanner, slacken/loosen the union nut on the valve highlighted on the below image.
We need to undo this enough to expose the olive. Note water will start to come out of the radiator while we do this, so be prepared.
Step 5 – Adding the PTFE Tape
This bit is quite important: the tape needs to wrap in a certain direction so it does not pull off when we screw the plug back in.
Pipe from below
Looking down at the valve from above, you need to wrap the tape in an anti-clockwise direction around the olive. Wrap about 6 times if you can, pulling tight as you go.
Pipe from the side
Sitting behind the valve facing the radiator, you need to wrap the tape in a clockwise direction around the olive. Wrap about 6 times if you can, pulling tight as you go.
Step 6 – Tighten the union nut
With the adjustable spanner, tighten the union nut on the valve highlighted on the below image.
Step 7 – Test the leak
Assuming you used the isolators as suggested, turn these back to the on position. Dry the connection with a towel, wait a few minutes and then run a tissue over it. If the tissue is dry then we have successfully fixed the leak. If it is still wet, then either re-try the steps above, or it may be time for a new valve. This type of leak can also return, so if it is a persistent issue, it may also be time to replace the valve.
Issue fixed or still a leak?
We do really hope that you have been able to fix these issues on your own, and that you no longer have a radiator leaking water. However, unfortunately, it isn’t always possible to fix a leak without either replacing parts or by consulting a professional. It could be that you need to purchase some new valves or radiators, which our team will be happy to help you with, just give us a call or drop us an email. If you’re on the hunt for some #homeinspo then head over to our Instagram page to see what other people have gone for.