A Comprehensive Guide to Radiator Restoration
Whether you’re taking on a large renovation project or you need an update, radiator refurbishment can be a brilliant way of sprucing up your home decor. Old, dusty and dirty radiators can be a real eyesore, not to mention that restoring old radiators can help save you a little bit of money as well as have a positive impact on the environment. Read on to discover some of the best ways to restore your radiators to their former glory in this ultimate guide to radiator restoration. Keep in mind that it is always important to check your manufacturer warranty is still in effect to ensure you do not void it when restoring radiators.If your radiator is dirty or dusty…
You just need to clean it. To clean your radiators and restore them to their former glory, you need to first turn off the heating. Learn how to turn off your radiators if you don’t know how already. Once the radiators are cold, give them a good hoover to get rid of as much dust as possible. If you have a radiator with fins, use a radiator brush to clean between them. Next, clean them with a soft cloth and some soap and warm water. Make sure you get into as many nooks and crannies as you can. An old, soft toothbrush works well on edges you can’t easily reach with a cloth. When they’re back to their sparkling selves, wipe them down with a damp cloth with no soap on and allow them to dry fully before turning the heating back on. 
You will probably find that by cleaning out all the dust, your radiators will be more efficient again which is another perk for keeping them clean. To learn more about cleaning radiators with top grills, check out our blog.
If your radiator is rusty…
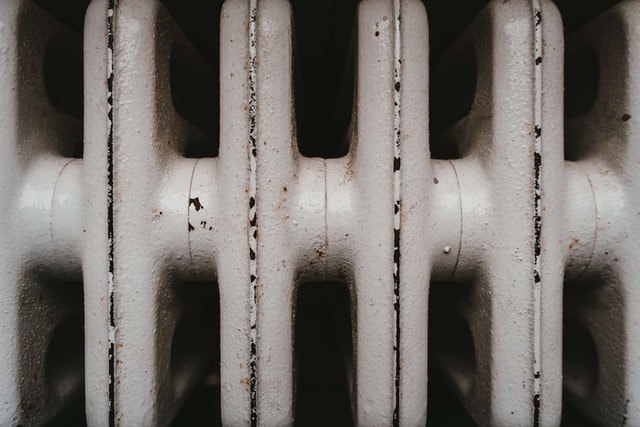
You need to tackle it. Rust is pretty unsightly and can really ruin the look of your radiators, but if it's an internal issue, it can ruin your entire radiator. To avoid this, tackle rust as soon as you find it. Unfortunately for our radiators, which are heated by letting water flow into and through them, water and metal don't mix. This can create rust and, especially in the case of bathroom radiators which are commonly in a damp environment, this can affect the appearance of your radiators. Here is how to identify whether you have internal or external rust issues: Is the radiator leaking from the chassis rather than the connection points? If it is, then the only real reason a radiator would rupture (unless someone took a hammer to it) is corrosion. If this is the case, then you will need to replace the radiator. When the heating is on, is the radiator cool or is there patchy heat at the bottom? If so, we’re looking at internal rust and corrosion. When the heating is off, try bleeding the radiator. Using a radiator key and with a small container in hand along with an old towel, open the bleed valve and allow the water to run for a few seconds. If the water that comes out is dark in colour then we know it is internal rust and corrosion. External radiator corrosion and rust can also be identified, generally this looks like pitting or blotchy spots in an area of the radiator where water can sit easily. It is commonly found on either the top and bottom of the radiator and can often be seen along the tubes of towel rails where the towel would sit. 
For detailed instructions on how to clean rust and prevent rust build-up, read our blog on how to stop your radiators from rusting and corroding.